ARIFA NADEEM

0 %
ARIFA NADEEM
WordPress Developer
  • Residence:
    UK
  • City:
    Manchester
  • Age:
    24
English
Urdu
WordPress
HTML/CSS
SEO
  • Figma/psd to Elementor
  • Woocommerce
  • Payment Integration
  • ACF
  • Complex and Multistep Forms
  • Customization
  • Speed Optimization
  • SEO
  • Hosing and domain
  • DNS Knowledge
  • Problem Solving
  • Filtering and listing
0

No products in the cart.

How to Build a Photography Website with WordPress in 7 Easy Steps

October 20, 2022

Are you a photographer looking to showcase your work online? If so, you’re in luck! Building a photography website is easier than ever before, thanks to WordPress. In this blog post, we’ll show you how to build a beautiful photography website using WordPress in just 7 easy steps. Let’s get started!

Table of Contents

Choose a Domain Name and Hosting Plan

The first step is to choose a domain name and hosting plan for your website. Your domain name is the URL people will use to access your site (e.g., www.x9sheikh.com). Once you’ve chosen a domain name, you’ll need to purchase a hosting plan. This is basically like renting space on the internet for your website. We recommend choosing a WordPress-specific hosting plan to make things easier down the road.

There are couple of hosting. But as a professional wordpress developer. I would suggest you the following:

1. Bluehost
2. WP Engine
3. SiteGround
4. Flywheel
5. Pagely
6. Godaddy

Install WordPress

Once you’ve purchased your hosting plan, the next step is to install WordPress onto your server. Don’t worry, this sounds more complicated than it actually is. Most hosting companies will have easy-to-follow instructions on how to do this. If you get stuck, feel free to contact our support team for assistance.

Choose a Theme

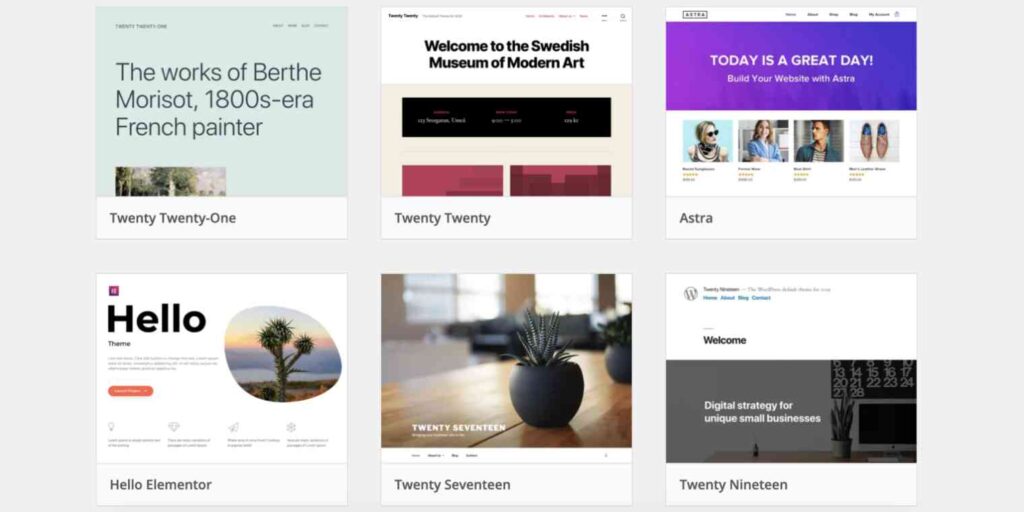
Now that WordPress is installed, it’s time to choose a theme for your website. A theme controls the overall design and layout of your site. There are thousands of themes to choose from, so take your time and find one that matches your style and needs. Once you’ve chosen a theme, go ahead and install it onto your site.

Choose a Theme, Theme Choose , Worldpress Theme Choose

Add Your Photos

Now it’s time to add some photos! WordPress makes it easy to upload and manage your photos using the built-in media library tool. Simply click on “Add New” in the media library and upload your photos from there. You can also create photo galleries and embed them into any page or post on your site with just a few clicks of the mouse.

Create Custom Pages

In addition to adding photos, you may also want to create some custom pages for your website (e.g., an “About Me” page or a “Contact” page). To do this, simply login to your WordPress dashboard and click on “Pages > Add New.” From there, you can add whatever content you like to these pages using the built-in WYSIWYG editor tool.

Configure Your Settings

There are a few final settings you’ll need to configure before launch- ing your site. Firstly, head over to the “Settings > General” page in your dashboard and update your site’s title, description, and URL if necessary. Next, click on “Settings > Reading” and choose whether you wantto display latest posts or static pages on your homepage. Finally, click on “Settings > Permalinks” and select the pretty permalink structure you wantto use for your URL s(we recommend avoiding the default setting).

Launch Your Site!

That’s it! Your photography website is now readyto be launched into cyberspace! Before doing so, however, we recommend taking some time to add additional content (e .g., blog posts) and tweak the design ofyour site until it’s just perfect . Once everything looks good , go aheadand hit that big “Publish” button! And just like that ,you’re live ! Congratulations—you did it!

Launch Your Site, Site Launch, wordpress Site Launch

FAQ

Your domain name is the URL people will use to access your site (e.g., www.x9sheikh.com). Once you’ve chosen a domain name, you’ll need to purchase a hosting plan. This is basically like renting space on the internet for your website. We recommend choosing a WordPress-specific hosting plan to make things easier down the road.

Most hosting companies will have easy-to-follow instructions on how to do this. If you get stuck, feel free to contact our support team for assistance.

A theme controls the overall design and layout of your site. There are thousands of themes to choose from, so take your time and find one that matches your style and needs. Once you’ve chosen a theme, go ahead and install it onto your site.

WordPress makes it easy to upload and manage your photos using the built-in media library tool. Simply click on “Add New” in the media library and upload your photos from there. You can also create photo galleries and embed them into any page or post on your site with just a few clicks of the mouse.

In addition to adding photos, you may also want to create some custom pages for your website (e.g., an “About Me” page or a “Contact” page). To do this, simply login to your WordPress dashboard and click on “Pages > Add New.” From there, you can add whatever content you like to these pages using the built-in WYSIWYG editor tool.

There are a few final settings you’ll need to configure before launching your site. Firstly, head over to the “Settings > General” page in your dashboard and update your site’s title, description, and URL if necessary. Next, click on “Settings > Reading” and choose whether you wantto display latest posts or static pages on your homepage. Finally, click on “Settings > Permalinks” and select the pretty permalink structure you wantto use for your URLs (we recommend avoiding the default setting).

That’s it! Your photography website is now ready to be launched into cyberspace! Before doing so, however, we recommend taking some time to add additional content (e.g., blog posts) and tweak the design of your site until it’s just perfect. Once everything looks good, go a headend hit that big “Publish” button! And just like that, you’re live! Congratulations—you did it!

Conclusion

Building a photography website with WordPress is easy and can be done in a few steps. If you follow the instructions provided, you will have a beautiful and professional site in no time. Creating a portfolio website is an important step for any photographer looking to showcase their work and attract new clients. With WordPress, you can create a site that is both stylish and functional, without breaking the bank. So what are you waiting for? Get started today and build the photography website of your dreams!

Hire me if you want to develop a professional portfolio website

If you need a website that looks Professional, Hire me. I am a website developer and a wordpress expert. I will help you to develop a website according to your need. You can buy my service and get a website that looks like it was developed by a pro. So don’t hesitate to hire me if you want to develop a professional website. Thank you.

Posted in WordPress
Write a comment